Webopac Preferences – Shelfmarks
1. Introduction
Vubis Smart allows you to link shelfmark locations in the WebOpac to a graphical representation. The shelfmark then becomes a hyperlink. For example, it could display a map or diagram of your library, showing the general location of an item that has been retrieved in a search.

When you click the link a diagram, map or similar is shown:

The texts and images are contained in a CSP page and can be different for each profile.
Note
Creation of a CSP page demands a knowledge of Caché. The addition of such a page by Infor would not be in the normal scope of installation.
See also the chapter on CSP pages in the Technical Tips section.
2. Setup
First you must create the CSP pages via the Caché cube – Configuration Manager.
You can optionally add images for each CSP page as well as descriptive text. These must also created prior to adding them via the Web Preferences tool.
· Click the button under the All Profiles section on the Start page.
The Shelfmarks screen is displayed:

· Select a language from the dropdown list.
· Select a database from the dropdown list.
· Select an institution/location from the dropdown list
· Enter a shelfmark (range) and an IP address.
· Choose the type (CSP page, text or image)
· and click on the button.
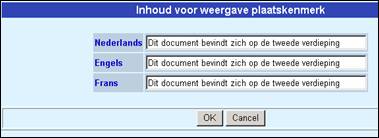
After clicking on the button the Content for display of shelfmark screen will be displayed:
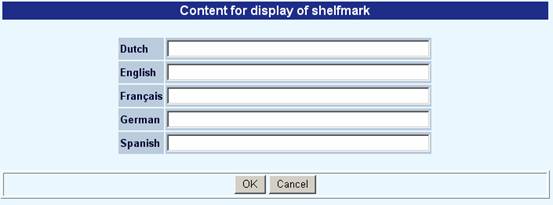
· Add the wording for each language and click .
When you are finished remember to click the button to save any changes you have made.